


A Complete Guide to Applying Vinyl Decals on Textured Walls
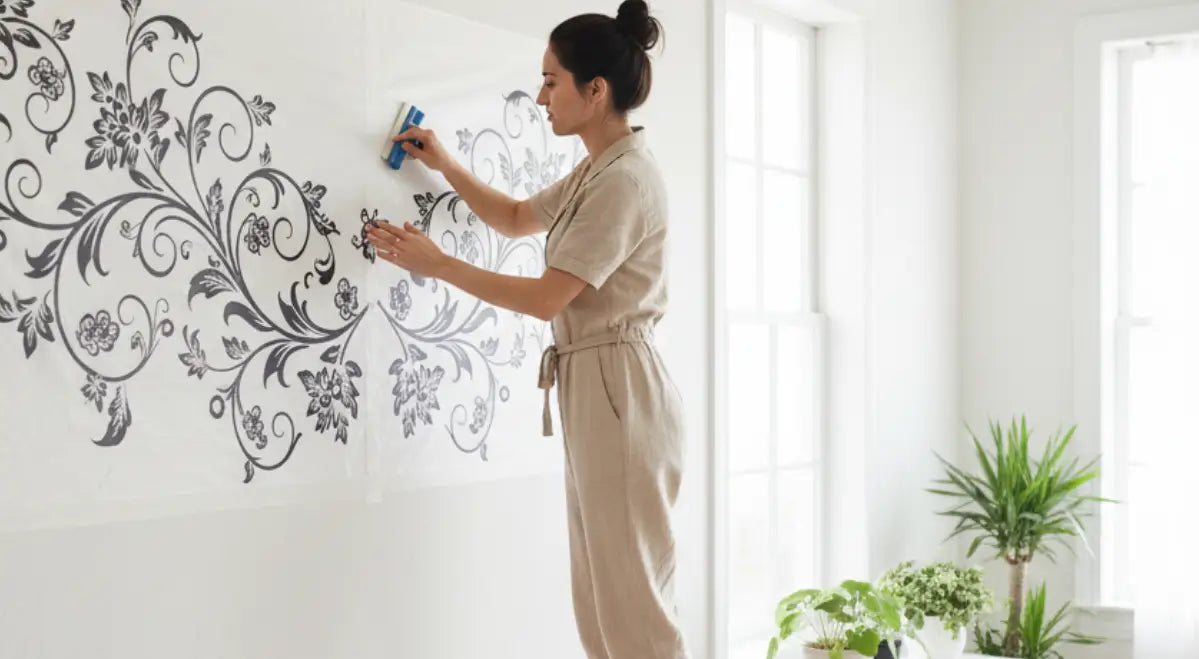
Found the perfect vinyl decal but worried your textured walls will ruin the look? It’s a very common and valid concern. So, let's start with the most important fact.
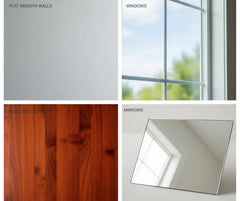
First and foremost, the ideal surface for a vinyl wall decal is one that is smooth and flat. Surfaces like smooth drywall, glass, mirrors, sealed wood furniture, and metal doors provide the best adhesion and the cleanest look.
However, we know that many modern homes don't have perfectly flat walls. The great news is that you can still achieve a beautiful result on most lightly textured walls. While these surfaces require a little extra effort and patience, this guide will walk you through the professional techniques to ensure your decal looks like it was painted on.
Will Your Wall Texture Work? A Quick Guide
The success of your decal application depends on how deep and uneven your wall's texture is.

-
Good Candidates 👍: These are common, light textures that are generally suitable for decals.
-
Orange Peel: As one of the most common residential wall textures, orange peel is often a good candidate for vinyl decals. Its gentle, rolling bumps can be worked with.
-
Knockdown: This texture is also very common and usually works well, as its surfaces are flatter than the deep grooves of heavier textures.
- Painted Concrete Block: While raw concrete block is too rough and porous for a decal's adhesive to properly bond, a painted surface is a completely different story. Several coats of quality paint transform the wall by filling in the tiny pores and smoothing out the rough texture. This process seals the surface, creating a non-porous and uniform finish that allows the decal's adhesive to form a strong, lasting bond, much like it would on a standard painted drywall.
-
-
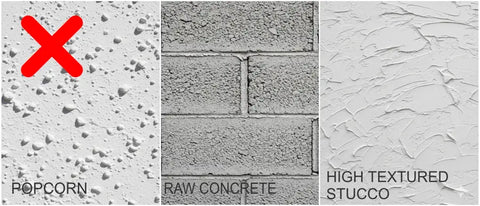
Difficult or Unsuitable 👎: These surfaces are too uneven or porous for the decal's adhesive to make proper contact.
-
Popcorn: Typically found on ceilings, this texture is too bumpy.
-
Slap Brush / Heavy Stomp: The deep, sharp grooves of these textures prevent the vinyl from adhering properly.
-
Porous Surfaces: Brick, unsealed wood, and Raw concrete block will not work. (However, concrete block that has several coats of quality paint, like in schools or commercial buildings, is often smooth and non-porous enough for a great application!)
-
Rule #1: Always Test First!
Your walls are unique. The texture, type of paint, and even the humidity in your home can affect how well a decal sticks. That’s why we include a practice wall decal with every order.
Before you even think about applying your main decal, use this small test piece.
-
Find an inconspicuous spot on the same wall where you plan to place your design. If you would like to display your practice piece permanently, just be sure to apply it to a wall with similar paint and texture for best testing and practice results.
-
Apply the practice decal using the instructions included and the tips below. Let it sit for 24 hours.
-
See how well it adheres and how easily it comes off.
This simple test will give you total confidence before you begin the main project. If you run into any issues with the practice decal, stop and contact us! Send us a few pictures of your wall and the test piece issues if possible, and our team will help you troubleshoot and make recommendations.
The Secret Weapon: A Step-by-Step Application Guide For Applying Decals to Textured Walls
Ready to go? Following these steps will make all the difference.
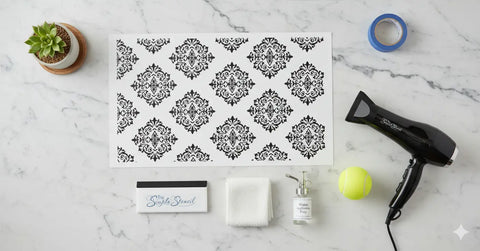
Step 1: Gather Your Tools
-
Your Vinyl Decal
-
The professional squeegee we included with your order
-
Masking Tape
-
The Pro Tools: A Hairdryer and a Tennis Ball or soft, dry cloth.

Step 2: Prepare the Surface
A clean wall is essential for good adhesion.
-
Clean the Wall: Gently wipe the application area with a damp cloth. Water is usually sufficient. Never use cleansers as they can leave a residue. A mixture of water and isopropyl alcohol is the recommended solution to remove any dust/cleansing residues and it will dry quicker than water alone.
-
Let It Dry Completely: Allow the wall to air dry for several hours. Moisture is the enemy of adhesive.
-
Fresh Paint? Wait! If your walls are freshly painted, you should wait at least 2-3 weeks for the paint to fully cure before applying any decal.
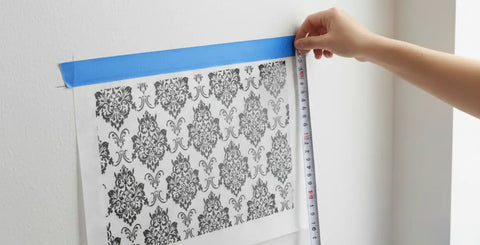
Step 3: Position and Apply the Decal
Begin by positioning your decal on the wall using the hinge method to ensure it's perfectly straight. Once you're satisfied with the placement, follow the standard application process: lift the decal, peel away the paper backing, and carefully smooth the decal—along with its top layer of transfer tape—onto the wall using your squeegee.
IMPORTANT: At the end of this step, your decal and transfer tape should be flat against the wall. Do not remove the transfer tape yet. The next steps are specifically for conforming the vinyl to your wall's texture.
Step 4: The Textured Wall Technique (The Important Part!)
This is what makes all the difference.
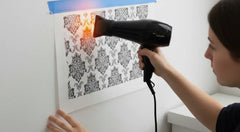
- Heat the Vinyl: Set your hairdryer to a medium heat setting. Gently warm a small section of the applied decal. This makes the vinyl soft and pliable, like a warm piece of taffy. Don't overheat it or hold the dryer too close (6-8 inches away is perfect).
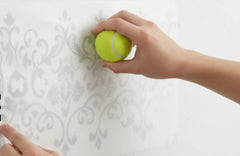
- Press and Conform: Immediately after heating, take your tennis ball or a bundled-up soft cloth and press the warm vinyl firmly into the wall. Use a rolling or dabbing motion to conform the decal to every tiny groove and bump of the texture. You will literally see it mold to the wall's surface.
- Repeat: Work in small, manageable sections across the entire decal: heat, then press. Heat, then press.
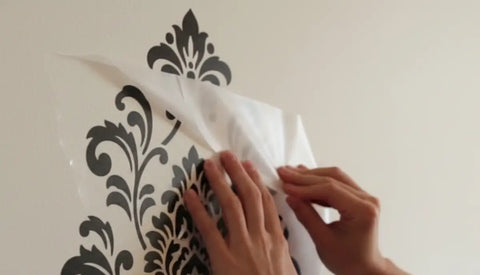
Step 5: Slowly Remove the Transfer Tape
Once the entire decal is applied and conformed, it's time to remove the top layer of transfer tape.
-
Peel, Don't Pull: Start at one corner and peel the tape back on itself at a sharp, 180-degree angle. Do not pull it straight out from the wall.
-
Go Slow: If a piece of the decal lifts with the tape, simply lay the tape back down, press the area firmly again (re-heating if needed), and then continue peeling.
Troubleshooting & Final Tips
-
Problem: The decal isn't sticking, even on a lightly textured wall.
-
Solution: Your wall might have been painted with Zero-VOC, stain-resistant, or "washable" paint. These paints have additives designed to repel stains and grime, which can also repel decal adhesive. This is why testing first is so important! Just go slowly and follow the instructions above, we are able to get them to work on our LOW VOC painted walls but it doe's require a little more effort.
-
-
Patience is Key: The heating and pressing technique takes more time, but the professional result is well worth the extra effort.
By testing your surface first and using these techniques, you can confidently decorate your textured walls and bring your creative vision to life.
This guide is part of our comprehensive Vinyl Decal FAQ Series. Check it out for more answers to your top questions!


